We on the server have construction
First you need to get your property.
You need to buy a base or for example a farm:
Example of buying a farm in klamat (20000)


Example of buying parts for construction in broken hills:


An example of the construction of the wall.
Put in slot # 1 and click on use. Or via the inventory - to use.And here is the wall established


Will do even couple of times so in different places:

To move, you need to enter the mapper mode (CTRL+X)
And on the interface select what you want to select for use (select, move)
For example we choose a selection of walls:

Now you can select the wall and hold CTRL and left mouse button - move the cursor to the desired location and release.


Sometimes it does not move immediately to the right place due to the displacement of the hexoganal grid and due to the fact that each element of the wall was next to another, and not in the spread (because of the same hexoganal grid had to make the movement exactly this way)
Now we need to select 2 a elements at once. To do this, hold down the left mouse button on an empty area of the screen and swipe (select) the desired items, and then release the mouse button, and here we have the selected items:


Now also move them through the Ctrl key, and do the same with the rest of the fragment


This seems like it would be possible to say. All walls have learned to build. But no.
In the walls are sometimes of the hole (because of the same hexagonal grid and the fact that 1 element = 1 hex) But it seems to mean that it takes a couple of hexes.
On this made a special hex(wall) for wall: (W)It refers to invisible elements of type FAST
element of type FAST (W) -not passable, not shot

to determine the location of the holes - you can: 1) just walk through the wall 2) holding F10 and scroll the mouse wheel, you can remove the wall

Lay out the element (W) on the floor, on the same principle as the wall. (put in slot #1 and press use). Or via the inventory - to use
Attention!To make visible the special hex, you need to click on FAST, on the right. To select - left
Select and move it to the desired location as well as the usual wall from the previous example. And here we have a full wall. And make show back walls (F10 and the mouse wheel)


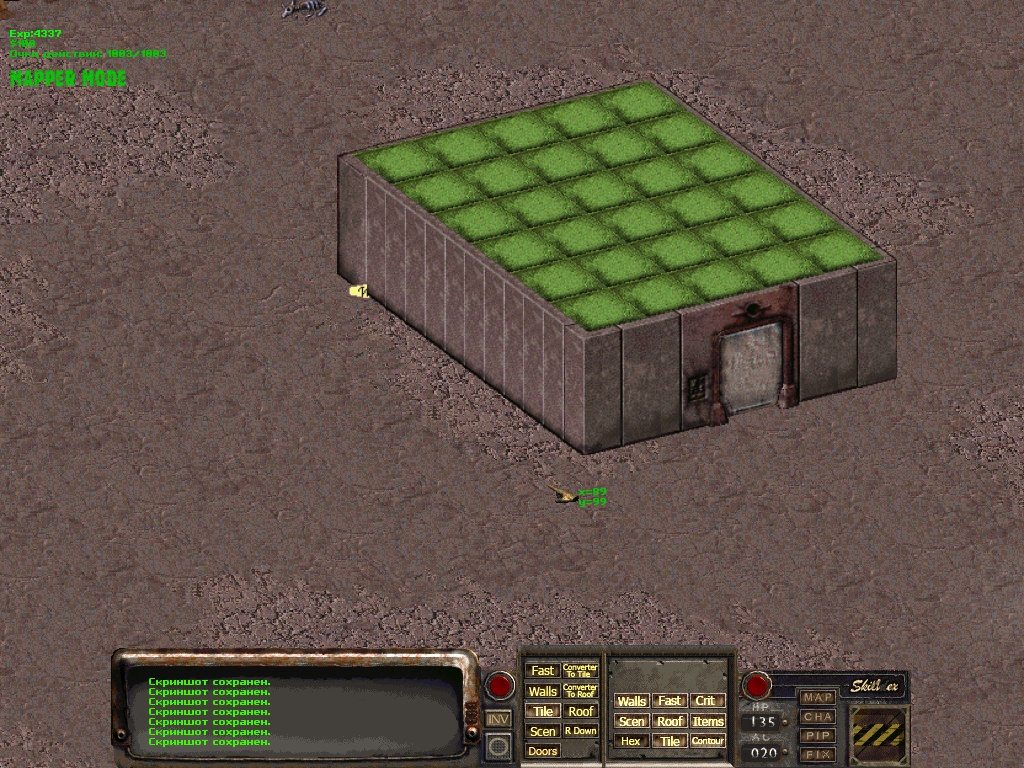
Floor, roof
And so here we have the box itself. Not only enough normal floor and roof:

floor construction:
Just lay the floor on the same principle as the walls, it's pretty easy and fun: you Can enable a grid, but maybe no grid to spread. Convenient in any case


You can try on the size, if the eye fails to determine:

And here we have a ready floor:


roof construction:
Let's make a roof out of the floor. Just select the floor and click on the button- Converter to Roof
And now the floor turned into a roof. But wait - it needs to move a little to the roof is easy exactly to the walls


For convenience - put the Roof on the floor, and move to the floor(also convenient to select the roof, so) ButtonR DOWN

remove the visibility of the walls, for convenience and move slightly down (requires experience and will be easy to get)


Click again R DOWN and now we have finished the roof